DNSChanger Trojan is name of a group of trojans (zlob dns changer, Troj/Rustok-N, W32/Tidserv. gaopdxserv.sys trojan, UACd.sys trojan, …).Once installed, it will redirect any web-browser to malicious, misleading, spam and other unwanted websites. DNSChanger trojan has be able to gather lots of privacy information which can be later sold to third party companies. You don’t know if your home address, account names and passwords are safe. And of course you completely don’t know what will happen when you click on any link in your internet browser.
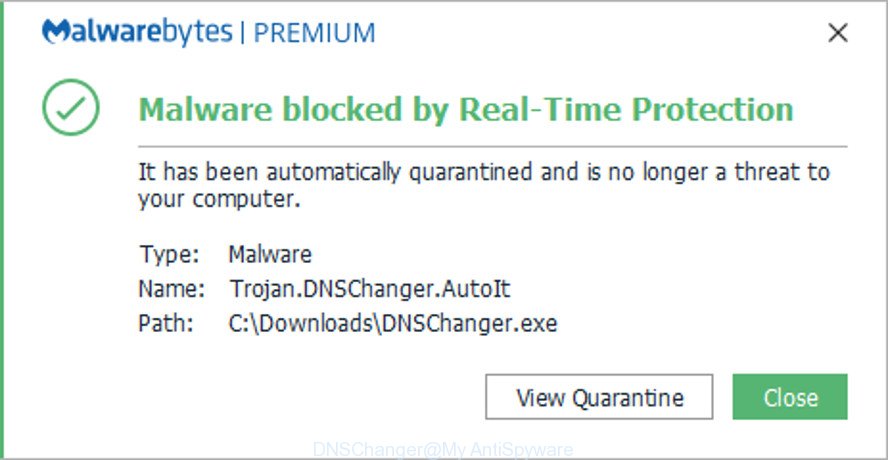
Malwarebytes blocks DNSChanger trojan from running
DNSChanger Trojan Symptoms
- Windows Update redirects you to msn.com;
- Google, Yahoo, Bing search results getting hijacked, links redirects to non related sites;
- Google/Yahoo/Bing has become slower when doing searches;
- Facebook and YouTube redirects to different sites;
- Any web page loads really slowly;
- System restore function is blocked;
- Adult, dating banner ads are popping up on some sites, include security sites;
- Cannot run msconfig;
- Cannot update antivirus and antispyware programs;
Most commonly, DNSChanger malware comes without the user’s knowledge. Therefore, many users aren’t even aware that their computer has been hijacked with malicious software. Please follow the easy rules in order to protect your computer from any malware: don’t install any suspicious apps, read the user agreement and select only the Custom, Manual or Advanced installation option, don’t rush to press the Next button. Also, always try to find a review of the application on the Internet. Be careful and attentive! If DNSChanger trojan has already come into your computer, then you need to check your PC for malware.
To find out how to remove DNSChanger virus, we suggest to read the steps added to this blog post below. The guidance was prepared by IT security professionals who discovered a method to uninstall DNSChanger malware out of the PC system.
Remove DNSChanger trojan
There are a few solutions that can be used to remove DNSChanger malware. But, not all unwanted software and malware can be completely removed using only manual methods. Most often you are not able to delete any virus utilizing standard MS Windows options. In order to delete DNSChanger virus you need complete a few manual steps and use reliable removal utilities. Most security specialists states that Zemana, MalwareBytes Anti-Malware or HitmanPro tools are a right choice. These free programs are able to find and uninstall DNSChanger trojan from your PC system and restore your system settings to defaults.
To remove DNSChanger, perform the steps below:
- Remove DNSChanger malware without any utilities
- Delete suspicious software through the Control Panel of your computer
- Clean up the web-browsers shortcuts that have been hijacked by virus
- Get rid of DNSChanger malware from Internet Explorer
- Delete DNSChanger trojan from Firefox
- Remove DNSChanger virus from Google Chrome
- Remove malicious Scheduled Tasks
- Scan your PC system and remove DNSChanger malware with free utilities
- How to stay safe online
- Repair your Internet settings
- Check and clean all infected machines
- Finish words
Remove DNSChanger malware without any utilities
The useful removal tutorial for the DNSChanger . The detailed procedure can be followed by anyone as it really does take you step-by-step. If you follow this process to remove DNSChanger let us know how you managed by sending us your comments please.
Delete suspicious software through the Control Panel of your computer
Some of PUPs, adware and browser hijackers can be uninstalled using the Add/Remove programs tool which can be found in the MS Windows Control Panel. So, if you are using any version of Windows and you have noticed an unwanted program, then first try to remove it through Add/Remove programs.
Windows 8, 8.1, 10
First, press Windows button

Once the ‘Control Panel’ opens, press the ‘Uninstall a program’ link under Programs category like below.
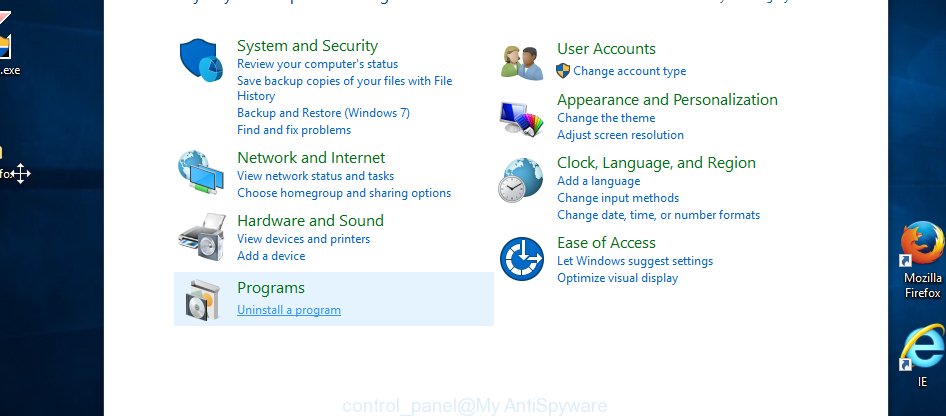
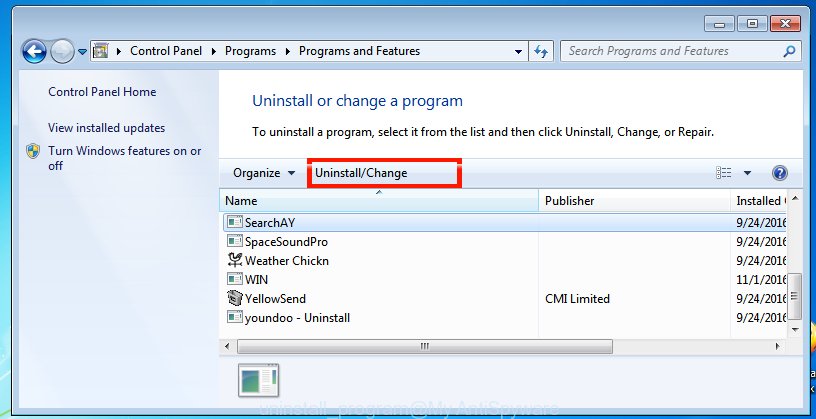
You will see the ‘Uninstall a program’ panel as on the image below.

Very carefully look around the entire list of programs installed on your PC. Most likely, one of them is the DNSChanger malware that can reroute your web browser to various intrusive web-sites. If you have many applications installed, you can help simplify the search of malicious apps by sort the list by date of installation. Once you have found a suspicious, unwanted or unused program, right click to it, after that click ‘Uninstall’.
Windows XP, Vista, 7
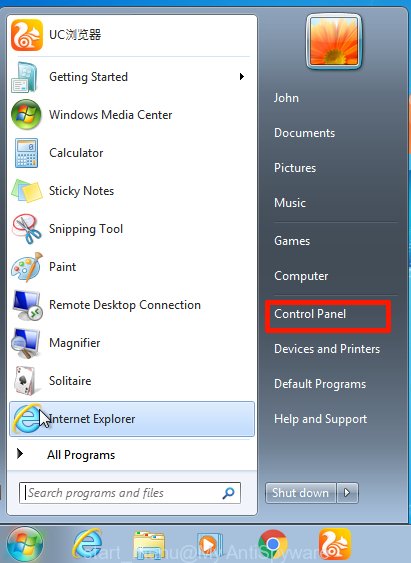
First, click ‘Start’ button and select ‘Control Panel’ at right panel as displayed in the figure below.
Once the Windows ‘Control Panel’ opens, you need to click ‘Uninstall a program’ under ‘Programs’ as displayed in the figure below.
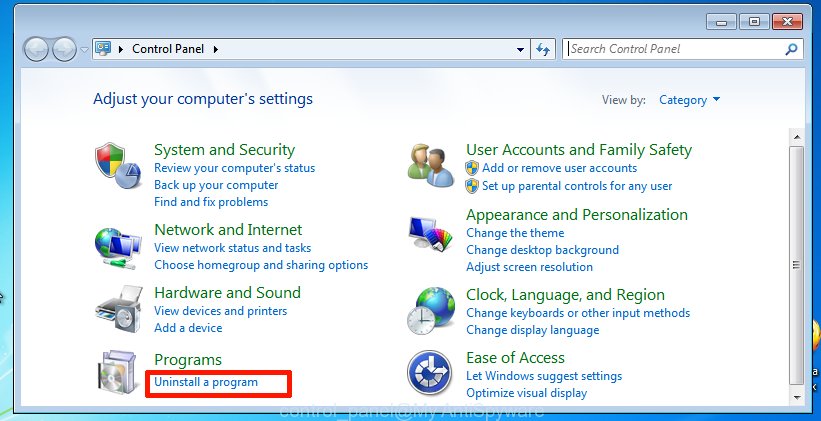
You will see a list of apps installed on your PC. We recommend to sort the list by date of installation to quickly find the apps that were installed last. Most likely, it’s the DNSChanger trojan. If you are in doubt, you can always check the program by doing a search for her name in Google, Yahoo or Bing. After the application which you need to delete is found, simply click on its name, and then press ‘Uninstall’ as displayed on the screen below.
Clean up the web-browsers shortcuts that have been hijacked by virus
After installed, DNSChanger malware may add an argument similar to “http://site.address” into the Target property of the desktop shortcut for the MS Edge, Firefox, Chrome and Internet Explorer. Due to this, every time you start the web browser, it will show a malicious or misleading web site.
To clear the internet browser shortcut file, right-click to it and choose Properties. On the Shortcut tab, locate the Target field. Click inside, you will see a vertical line – arrow pointer, move it (using -> arrow key on your keyboard) to the right as possible. You will see a text such as “http://site.address” that has been added here. You need to delete it.

When the text is removed, press the OK button. You need to clean all shortcuts of all your browsers, as they may be affected too.
Get rid of DNSChanger malware from Internet Explorer
In order to restore browser settings and remove malicious browser extensions you need to reset the Internet Explorer to the state, that was when the MS Windows was installed on your machine.
First, run the Microsoft Internet Explorer, then click ‘gear’ icon ![]() . It will display the Tools drop-down menu on the right part of the web-browser, then press the “Internet Options” as displayed on the screen below.
. It will display the Tools drop-down menu on the right part of the web-browser, then press the “Internet Options” as displayed on the screen below.

In the “Internet Options” screen, select the “Advanced” tab, then click the “Reset” button. The Internet Explorer will open the “Reset Internet Explorer settings” dialog box. Further, click the “Delete personal settings” check box to select it. Next, click the “Reset” button as shown below.

After the process is complete, click “Close” button. Close the Internet Explorer and reboot your personal computer for the changes to take effect. This step will help you to restore your web-browser’s new tab, search engine and homepage to default state.
Delete DNSChanger trojan from Firefox
Resetting Mozilla Firefox browser will reset all the settings to their default state and will remove malicious add-ons and its settings. It will save your personal information like saved passwords, bookmarks, auto-fill data and open tabs.
Click the Menu button (looks like three horizontal lines), and click the blue Help icon located at the bottom of the drop down menu as displayed on the screen below.
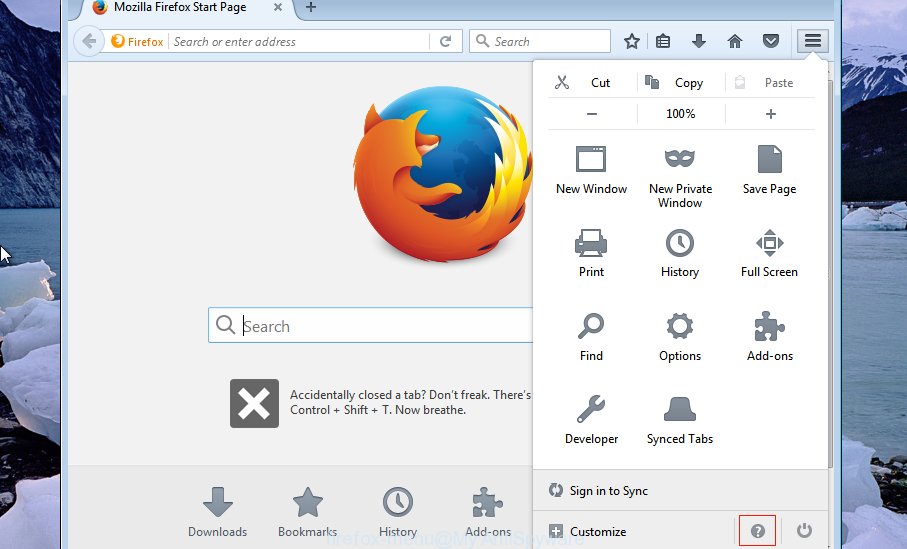
A small menu will appear, press the “Troubleshooting Information”. On this page, click “Refresh Firefox” button like below.

Follow the onscreen procedure to return your Firefox internet browser settings to their default state.
Remove DNSChanger virus from Google Chrome
Run the Reset web browser tool of the Chrome to reset all its settings such as newtab page, default search provider and home page to original defaults. This is a very useful tool to use, in the case of web-browser redirects to undesired web sites.
Open the Google Chrome menu by clicking on the button in the form of three horizontal dotes (![]() ). It will display the drop-down menu. Choose More Tools, then click Extensions.
). It will display the drop-down menu. Choose More Tools, then click Extensions.
Carefully browse through the list of installed extensions. If the list has the plugin labeled with “Installed by enterprise policy” or “Installed by your administrator”, then complete the following guide: Remove Chrome extensions installed by enterprise policy otherwise, just go to the step below.
Open the Chrome main menu again, click to “Settings” option.
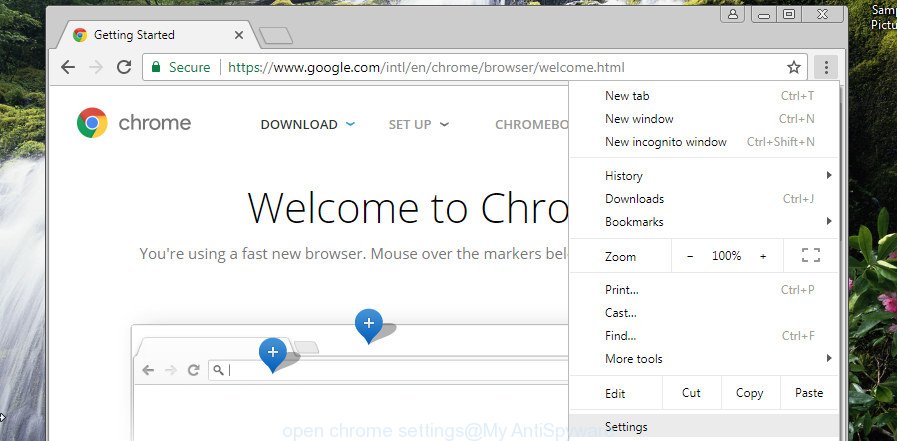
Scroll down to the bottom of the page and click on the “Advanced” link. Now scroll down until the Reset settings section is visible, as shown in the following example and click the “Reset settings to their original defaults” button.
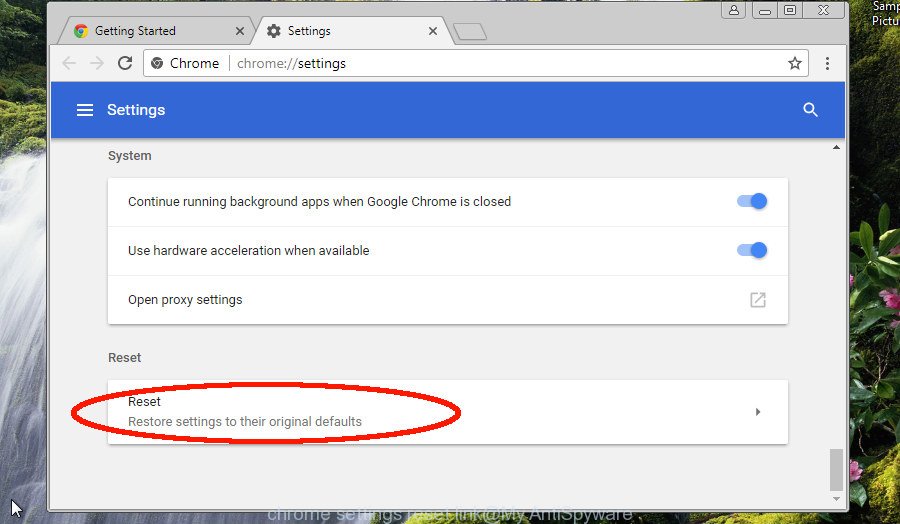
Confirm your action, press the “Reset” button.
Remove malicious Scheduled Tasks
Once installed, the DNSChanger malware virus can add a task in to the Windows Task Scheduler Library. Due to this, every time when you boot your computer, it will show an unwanted web-page. So, you need to check the Task Scheduler Library and delete all malicious tasks that have been created by unwanted apps.
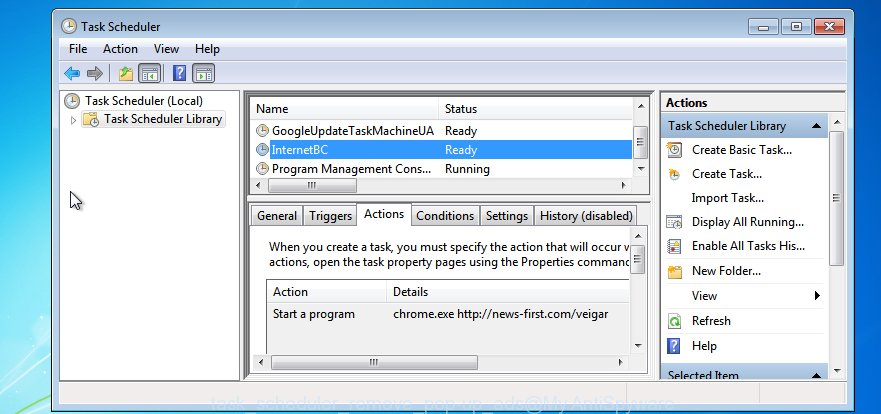
Press Windows and R keys on the keyboard at the same time. This shows a prompt that titled as Run. In the text field, type “taskschd.msc” (without the quotes) and press OK. Task Scheduler window opens. In the left-hand side, click “Task Scheduler Library”, as shown below.
Task scheduler
In the middle part you will see a list of installed tasks. Please choose the first task, its properties will be open just below automatically. Next, click the Actions tab. Pay attention to that it launches on your computer. Found something like “explorer.exe http://site.address” or “chrome.exe http://site.address”, then remove this malicious task. If you are not sure that executes the task, check it through a search engine. If it’s a component of unwanted programs, then this task also should be removed.
Having defined the task that you want to get rid of, then click on it with the right mouse button and choose Delete as shown in the figure below.

Delete a task
Repeat this step, if you have found a few tasks that have been created by DNSChanger trojan. Once is finished, close the Task Scheduler window.
Scan your PC system and remove DNSChanger malware with free utilities
Anti-Malware apps differ from each other by many features like performance, scheduled scans, automatic updates, virus signature database, technical support, compatibility with other antivirus applications and so on. We suggest you run the following free software: Zemana Anti-Malware, MalwareBytes Free and HitmanPro. Each of these programs has all of needed features, but most importantly, they can look for this trojan and remove DNSChanger malware from Microsoft Windows 10 (8, 7 and XP) for good. If DNSChanger trojan returns after rebooting your computer, then boot the Windows OS into Safe Mode and run your anti-malware tool once again.
Delete DNSChanger with Zemana Anti-malware
We advise you to use the Zemana Anti-malware that are completely clean your PC system of DNSChanger malware that can cause multiple undesired ads and pop-ups. Moreover, the utility will allow you to remove potentially unwanted programs, malware, toolbars and hijackers that your personal computer can be infected too.
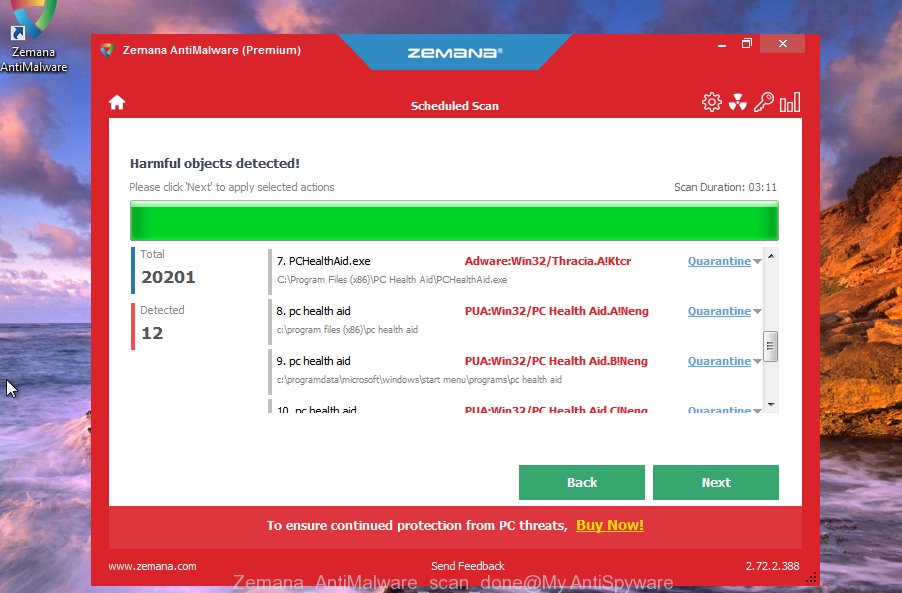
- Click the following link to download Zemana Free. Save it to your Desktop so that you can access the file easily.
Zemana AntiMalware
165094 downloads
Author: Zemana Ltd
Category: Security tools
Update: July 16, 2019
- Once the downloading process is done, close all applications and windows on your personal computer. Open a directory in which you saved it. Double-click on the icon that’s named Zemana.AntiMalware.Setup.
- Further, click Next button and follow the prompts.
- Once setup is finished, click the “Scan” button to start checking your PC for the DNSChanger trojan. A scan can take anywhere from 10 to 30 minutes, depending on the number of files on your PC system and the speed of your computer. During the scan Zemana AntiMalware (ZAM) will detect threats present on your computer.
- After the scan is complete, a list of all threats found is produced. Review the scan results and then click “Next”. Once the cleaning procedure is done, you can be prompted to reboot your personal computer.
Remove DNSChanger malware from internet browsers with HitmanPro
HitmanPro is a free removal tool that can be downloaded and use to get rid of DNSChanger malware that can inject ads into the web pages that you are visiting, browser hijackers, malicious software, potentially unwanted software, toolbars and other threats from your system. You can use this tool to look for threats even if you have an antivirus or any other security program.
Installing the HitmanPro is simple. First you’ll need to download Hitman Pro by clicking on the link below.
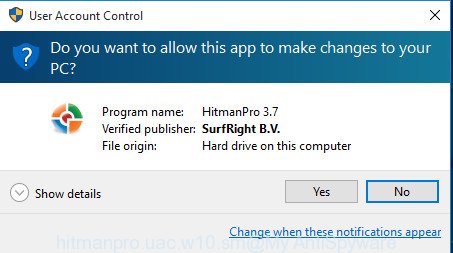
After the downloading process is finished, open the directory in which you saved it and double-click the Hitman Pro icon. It will start the HitmanPro tool. If the User Account Control dialog box will ask you want to open the program, press Yes button to continue.
Next, press “Next” to perform a system scan for the DNSChanger trojan and other malware. While the HitmanPro application is scanning, you can see number of objects it has identified as threat.
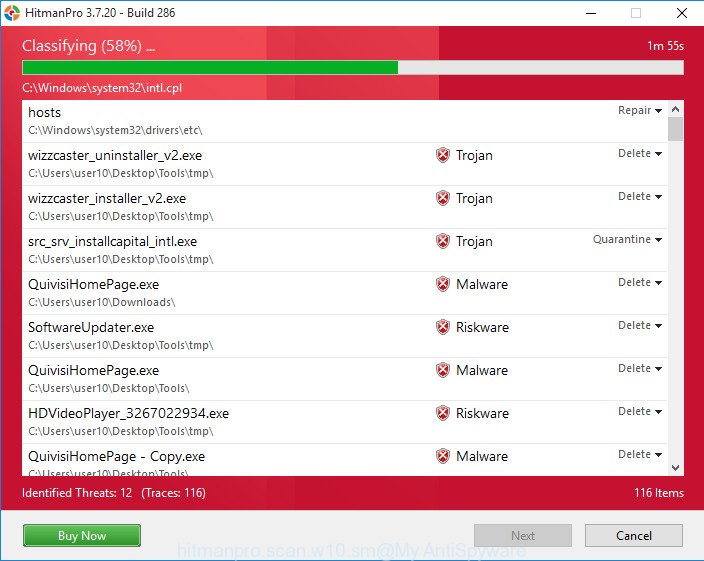
As the scanning ends, a list of all threats detected is produced as on the image below.
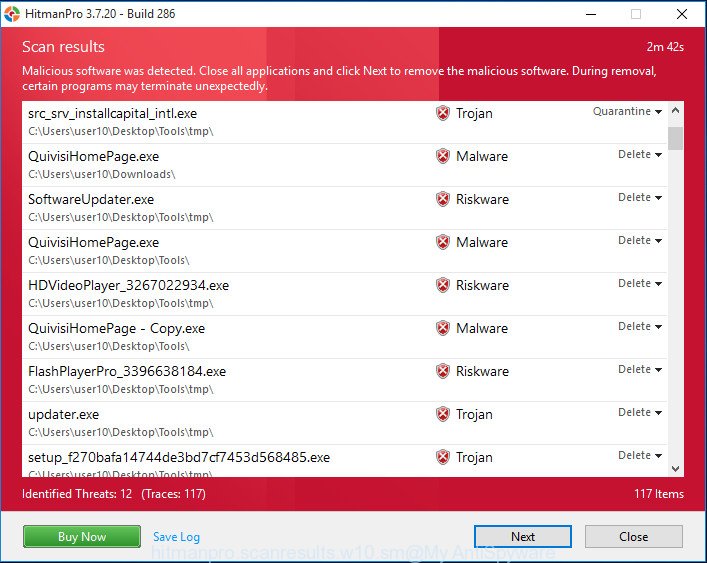
Once you have selected what you want to remove from your PC system press “Next” button. It will display a dialog box, click the “Activate free license” button. The HitmanPro will remove DNSChanger malware and move threats to the program’s quarantine. When the clean-up is complete, the utility may ask you to restart your computer.
Run Malwarebytes to get rid of DNSChanger trojan
We suggest using the Malwarebytes Free that are completely clean your computer of DNSChanger malware. The free tool is an advanced malware removal program developed by (c) Malwarebytes lab. This program uses the world’s most popular anti-malware technology. It is able to help you remove malware from your web browsers, potentially unwanted applications, hijackers, toolbars, ransomware and other security threats from your PC system for free.
- Click the link below to download the latest version of MalwareBytes AntiMalware for MS Windows. Save it on your Microsoft Windows desktop or in any other place.
Malwarebytes Anti-malware
327319 downloads
Author: Malwarebytes
Category: Security tools
Update: April 15, 2020
- At the download page, click on the Download button. Your browser will open the “Save as” prompt. Please save it onto your Windows desktop.
- After downloading is finished, please close all applications and open windows on your computer. Double-click on the icon that’s named mb3-setup.
- This will launch the “Setup wizard” of MalwareBytes Free onto your computer. Follow the prompts and do not make any changes to default settings.
- When the Setup wizard has finished installing, the MalwareBytes Anti Malware (MBAM) will start and show the main window.
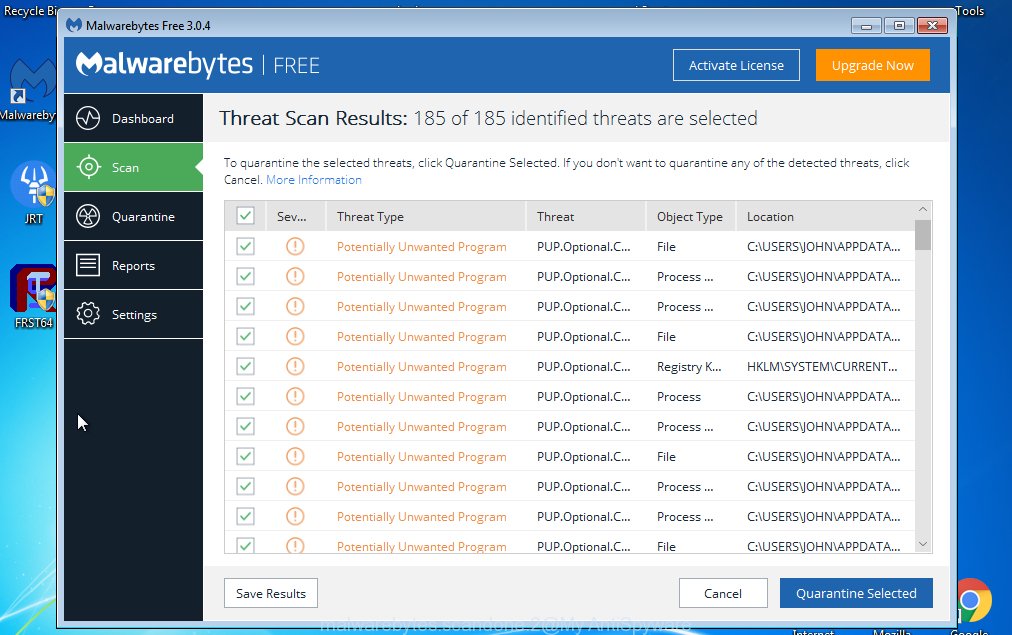
- Further, click the “Scan Now” button to perform a system scan for the DNSChanger trojan . A system scan can take anywhere from 5 to 30 minutes, depending on your system. When a malicious software, adware or PUPs are found, the number of the security threats will change accordingly.
- After finished, a list of all threats found is produced.
- Review the results once the utility has finished the system scan. If you think an entry should not be quarantined, then uncheck it. Otherwise, simply click the “Quarantine Selected” button. When finished, you may be prompted to reboot the computer.
- Close the Anti-Malware and continue with the next step.
Video instruction, which reveals in detail the steps above.
How to stay safe online
The AdGuard is a very good ad blocking program for the Google Chrome, Mozilla Firefox, Internet Explorer and Edge, with active user support. It does a great job by removing certain types of annoying ads, popunders, popups, unwanted new tab pages, and even full page ads and website overlay layers. Of course, the AdGuard can stop malicious and misleading web-pages automatically or by using a custom filter rule.
AdGuard can be downloaded from the following link. Save it directly to your MS Windows Desktop.
26913 downloads
Version: 6.4
Author: © Adguard
Category: Security tools
Update: November 15, 2018
When the downloading process is done, double-click the downloaded file to start it. The “Setup Wizard” window will show up on the computer screen as shown on the screen below.
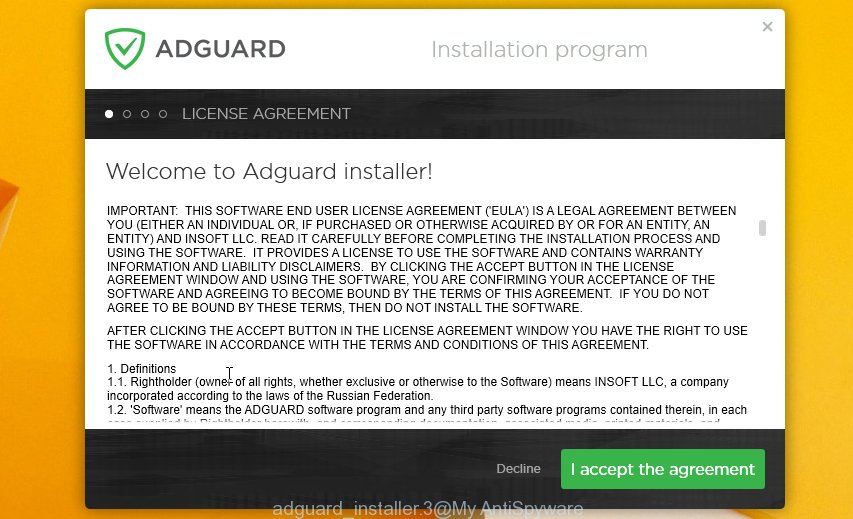
Follow the prompts. AdGuard will then be installed and an icon will be placed on your desktop. A window will show up asking you to confirm that you want to see a quick instructions as shown on the screen below.

Press “Skip” button to close the window and use the default settings, or click “Get Started” to see an quick guidance that will allow you get to know AdGuard better.
Each time, when you run your computer, AdGuard will run automatically and block pop up ads, web-browser redirects, as well as other harmful or misleading sites. For an overview of all the features of the application, or to change its settings you can simply double-click on the AdGuard icon, that may be found on your desktop.
Repair your Internet settings (Set option “Obtain DNS servers automatically”).
During the installation on the computer, DNSChanger malware can change or damage your Internet/Network settings, so you need to check and restore these settings. Skip this step, if computer uses static ip address (ask your Internet Service Provider).
- Go to Start -> Control Panel ->Network Connections;
- Right click your default connection, usually Local Area Connection or Wi-Fi Connection;
- Double-click on the Internet Protocol (TCP/IP) item and select the radio button that says Obtain DNS servers automatically, click OK twice;
- Go to Start -> Run, enter
CMDand click OK; - At the Dos Prompt Screen, type in
cd\and then press ENTER; - Now type in
ipconfig /flushdnsand then press ENTER (notice the space after ipconfig); - Close the command prompt window;
- Reboot your PC.
Check and clean all infected machines
- If you have a home network or other DNSChanger infected machines using your router, you should clean them with the above steps;
- Now your should reset your router (trojan DNSChanger can change the router’s DNS settings), click Reset button on back side of the router;
- You may also need to consult with your Internet service provider to find out which DNS servers you should be using.
Finish words
Once you’ve done the few simple steps shown above, your computer should be clean from DNSChanger malware and other unwanted software. The Edge, Internet Explorer, Chrome and Mozilla Firefox will no longer redirect you onto malicious and misleading web-pages when you surf the Web. Unfortunately, if the steps does not help you, then you have caught a new trojan, and then the best way – ask for help.
Please start a new thread by using the “New Topic” button in the Spyware Removal forum. When posting your HJT log, try to give us some details about your problems, so we can try to help you more accurately. Wait for one of our trained “Security Team” or Site Administrator to provide you with knowledgeable assistance tailored to your problem with the DNSChanger trojan.


Thank you but i got it. I just updated my firmware on my router and it was fixed.
A customer of mine had the av8 virus which even after being removed had left a browser redirect to antimalwarelist.com
It does not get removed by malwarebytes/spybot/superanti etc. It’s embedded into the MBR. It gets succesfully removed by the above kaspersky tool TDSSKiller.
Thanks very much!
Been fighting this problem for several days. Webroot detected and deleted Winlogonhook, but it kept returning. I finally found the offending dll manually, but the DNS redirection problem continued.
TDSSKiller looks like it solved the problem. I can now connect with MS update.
One reminder when working with similar problems, turn off software restore then reactivate once system is clean and working normally.
Hey Patrik, I have “Antivirus Scan” and I’m trying to get rid of it. I have downloaded HijackThis and I tried to download Malware Bytes and it said the browser couldn’t find the webpage, so I assumed I needed to remove this TrojanDNSChanger. When I click “properties” after right-clicking “My Computer” it says “Application cannot be executed. The file rundll32.exe is infected. Do you want to activate your antivirus software now?” What do I do now?
Javi, follow the instructions http://www.myantispyware.com/2010/12/18/how-to-remove-antivirus-scan-virus-uninstall-instructions/
Important steps:
1. reboot in safe mode
2. reset proxy settings
I did everything and it seemed to have removed antivirus scan, but even though the machine has an ip address and I can ping my router I can not get online.
Al, try reset proxy settings. Look my previous comment.
I followed the instructions and now no desktop appears just my screensaver photo-no other icons. help!m
I tried safemode too and it is the same result, my desktop seems to have been erased?
Please help! I found I had the DNS Changer trojan after I ran Super Anti-Spyware. So I removed / quarantined the offending items. But now I can’t get an internet connection. I just get “acquiring network address” as the status?
Thanks.
thanks so much i had tried everything 🙂 this worked
cannot get on-line with my pc but can with my laptop. have norton 360 but can’t access it on the pc. help……..when i checked on line to see if my comps had the virus, both were clean, so they said.
forgot to mention that i am completly self taught on these things and i tried rebooting to what i thought was a safe date.