 Windows Rescue Center is is just another fake anti-spyware application which displays hundreds of fake alerts, detects fake infections in order to scare you and make you believe in some danger that does not exist. It hopes that you will next purchase its full (paid) version. Remember, the program is unable to detect or rid your system of parasites nor will be protect you from legitimate future threats, so you should stay away of this application! Read below what you’ll want to know though is what does this malware do and how to remove it from your PC for free.
Like other programs from same family of malware, Windows Rescue Center uses the name of Microsoft Windows and distributed with the help of Microsoft Security Essentials Alert infection. It will display a fake Microsoft Security Essentials alert that states “Unknown Win32/Trojan was detected on your computer” and next offer you to scan your computer. Once scan is complete, it will report that a particular file is infected with Trojan.Horse.Win32.PAV.64.a. and then prompt you to download and install Windows Rescue Center to remove the trojan.
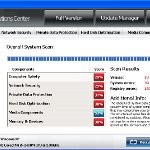
During installation, the malicious program will configure itself to run automatically every time when Windows loads. Once the installation is complete, it will reboot your computer. When Windows is loaded, you will be surprised to see that Windows Rescue Center screen appears before your normal Windows desktop. It will suggest to perform a scan of your computer. During the fake scan, it will detect a lot of infections to trick you into thinking your computer in danger. The program will report that was able to clean the majority of infected files, but was not able to cure a few important Windows files and offer to purchase the full version of Windows Rescue Center to clean them. However, the scan results is a scam, because it is neither able to detect, nor to remove anything from your computer, especially viruses or other kind of malware. Thus, do not pay for the bogus software, simply ignore all that the fake antivirus will display you.
While Windows Rescue Center is running, it will display a variety of fake security warnings. Some of the alerts are:
Attention
Suspicious software activity is detected.
Please start system files scanning for details.
Warning!
Name: taskmgr.exe
Name: C:\WINDOWS\taskmgr.exe.
Viruses: Backdoor.Win32
Just like false scan results above, all of these alerts are a fake and supposed to scare you into thinking your computer is in danger. You should ignore all of them!
In addition to fake security warnings and computer scans, the malicious program blocks legitimate Windows applications claiming that they are infected. Thus, you will be unable to run some programs, including antivirus software.
From the above, obviously, Windows Rescue Center is a scam, that created with one purpose to scare your into purchasing so-called “full” version of the program. Most importantly, do not purchase it! Instead, use the removal instructions below to remove Windows Rescue Center and any associated malware from your computer for free.
Automatic removal instructions for Windows Rescue Center
1. Once Windows loaded you will see a Windows Rescue Center screen. Click OK button to perform a fake scan. Once the scan is complete, press the “Fix Errors” button. Now you can close the program. Click “X” button at the top-right of Windows Rescue Center or press ALT + F4. After that your Windows Desktop will be available.
2. Click Start, Type in search field (if you use Windows XP, then Click Start, Run and type in Open field): %APPDATA% as shown below.

3. Press Enter. It will open the contents of Application Data folder (for Windows XP) or the contents of Roaming folder (for Windows Vista, Windows 7). Next open the Microsoft folder as shown in the screen below.

4. Basically, there will be a file named with a series of numbers or letter (e.g. wsewsu.exe or wsewsu, look the example above), right click to it and select Rename (don`t rename any folders). Type any new name (123.exe) and press Enter. Reboot your computer.
5. Download MalwareBytes Anti-malware (MBAM). Once downloaded, close all programs and windows on your computer.
6. Double-click on the icon on your desktop named mbam-setup.exe. This will start the installation of MalwareBytes Anti-malware onto your computer. When the installation begins, keep following the prompts in order to continue with the installation process. Do not make any changes to default settings and when the program has finished installing, make sure a checkmark is placed next to “Update Malwarebytes’ Anti-Malware” and Launch “Malwarebytes’ Anti-Malware”. Then click Finish.
7. MalwareBytes Anti-malware will now automatically start and you will see a message stating that you should update the program before performing a scan. If an update is found, it will download and install the latest version.
8. As MalwareBytes Anti-malware will automatically update itself after the install, you can press the OK button to close that box and you will now be at the main menu. You will see window similar to the one below.

Malwarebytes Anti-Malware Window
9. Make sure the “Perform quick scan” option is selected and then click on the Scan button to start scanning your computer for Windows Rescue Center associated malware. This procedure can take some time, so please be patient.
10. When the scan is finished a message box will appear that it has completed scanning successfully. Click OK. Now click “Show Results”. You will see a list of infected items similar as shown below.
Note: list of infected items may be different than what is shown in the image below.

Malwarebytes Anti-malware, list of infected items
11. Make sure all entries have a checkmark at their far left and click “Remove Selected” button to remove Windows Rescue Center infection. MalwareBytes Anti-malware will now remove all files and registry keys associated with Windows Rescue Center and add them to the programs’ quarantine. When MalwareBytes Anti-malware has finished removing the infection, a log will open in Notepad and you may be prompted to Restart.
Windows Rescue Center removal notes
Note 1: if you can not download, install, run or update Malwarebytes Anti-malware, then follow the steps: Malwarebytes won`t install, run or update – How to fix it.
Note 2: if you need help with the instructions, then post your questions in our Spyware Removal forum.
Note 3: your current antispyware and antivirus software let the infection through ? Then you may want to consider purchasing the FULL version of MalwareBytes Anti-malware to protect your computer in the future.
Windows Rescue Center creates the following files and folders
%AppData%\Microsoft\{RANDOM}.exe
Windows Rescue Center creates the following registry keys and values
HKEY_LOCAL_MACHINE\SOFTWARE\Microsoft\Windows NT\CurrentVersion\Image File Execution Options\avastsvc.exe
HKEY_LOCAL_MACHINE\SOFTWARE\Microsoft\Windows NT\CurrentVersion\Image File Execution Options\avastui.exe
HKEY_LOCAL_MACHINE\SOFTWARE\Microsoft\Windows NT\CurrentVersion\Image File Execution Options\msascui.exe
HKEY_LOCAL_MACHINE\SOFTWARE\Microsoft\Windows NT\CurrentVersion\Image File Execution Options\msmpeng.exe
HKEY_LOCAL_MACHINE\SOFTWARE\Microsoft\Windows NT\CurrentVersion\Image File Execution Options\msseces.exe
HKEY_LOCAL_MACHINE\SOFTWARE\Microsoft\Windows NT\CurrentVersion\Image File Execution Options\egui.exe | Debugger
HKEY_LOCAL_MACHINE\SOFTWARE\Microsoft\Windows NT\CurrentVersion\Image File Execution Options\ekrn.exe | Debugger
HKEY_CURRENT_USER\Software\Microsoft\Windows NT\CurrentVersion\Winlogon | Shell = “%AppData%\Microsoft\{random}.exe”