What is AssistiveFile
According to security specialists, AssistiveFile is a potentially unwanted application (PUA) that belongs to the Adware group . Adware is type of software designed to insert adverts into your Web browsing or even desktop experience. Adware software can be developed to change your homepage, search engine, search results, or even add toolbars to your browser. Adware run in the background when you’re online, and adware can slow down your machine and affect its performance.
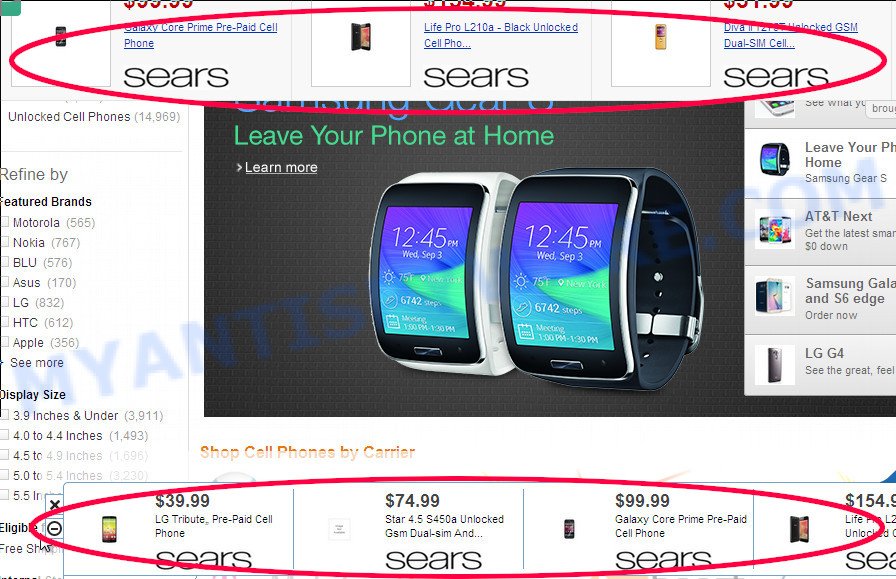
Unwanted ads
The worst is, adware can gather and transmit personal info without your knowledge. Adware can be used to track information about webpages visited, browser and system information, and your computer IP address.
The tutorial below explaining steps to remove AssistiveFile. Feel free to use it for removal of the adware that may attack Firefox, Chrome and Safari and other popular web-browsers. The steps will help you get rid of AssistiveFile adware and thereby clean your web-browser from all unwanted advertisements.
How does AssistiveFile get on your Apple Mac
The majority of adware software is bundled within free software or even paid applications that Internet users can easily download online. The setup files of such programs, most often, clearly indicate that they will install bundled programs. The option is given to users to stop the installation of any additional software. So, in order to avoid the installation of any adware: read all disclaimers and install screens very carefully, select only Custom or Advanced installation option and uncheck all optional software in which you are unsure.
Threat Summary
| Name | AssistiveFile, Assistive File 1.0 app |
| Type | adware, potentially unwanted application (PUA), pop-up virus, pop-up advertisements, pop-ups |
| Symptoms |
|
| Removal | AssistiveFile removal guide |
How to Remove AssistiveFile (removal instructions)
Fortunately, we have an effective way which will assist you manually or/and automatically get rid of AssistiveFile ads from your web-browser and bring your internet browser settings, including newtab page, homepage and default search engine, back to normal. Below you will find a removal instructions with all the steps you may need to successfully remove adware software and its traces. Read this manual carefully, bookmark it or open this page on your smartphone, because you may need to shut down your web browser or restart your machine.
To remove AssistiveFile, perform the steps below:
- How to get rid of AssistiveFile adware software without any software
- Automatic Removal of AssistiveFile adware software
- How to stay safe online
- Finish words
How to get rid of AssistiveFile adware software without any software
This part of the blog post is a step-by-step guidance that will show you how to remove AssistiveFile adware manually. You just need to follow every step. In this case, you do not need to install any additional utilities.
Uninstall potentially unwanted software using the Finder
The process of adware removal is generally the same across all versions of Mac OS. To start with, it is necessary to check the list of installed applications on your Apple Mac and uninstall all unused, unknown and questionable software.
Open Finder and click “Applications”.
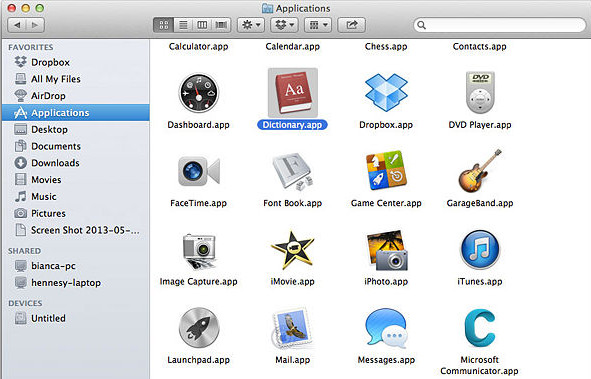
It will show a list of all software installed on your computer. Scroll through the all list, and uninstall any questionable and unknown apps. Right click to questionable application and select “Move to Trash”. Another solution is drag the program from the Applications folder to the Trash.
Most important, scroll through the all list, and move to trash any unknown applications. Don’t forget, choose Finder -> Empty Trash.
Remove AssistiveFile adware software from Google Chrome
Another solution to delete AssistiveFile ads from Google Chrome is Reset Google Chrome settings. This will disable malicious extensions and reset Chrome settings to original settings. Your saved bookmarks, form auto-fill information and passwords won’t be cleared or changed.
Open the Google Chrome menu by clicking on the button in the form of three horizontal dotes (![]() ). It will show the drop-down menu. Choose More Tools, then press Extensions.
). It will show the drop-down menu. Choose More Tools, then press Extensions.
Carefully browse through the list of installed extensions. If the list has the addon labeled with “Installed by enterprise policy” or “Installed by your administrator”, then complete the following tutorial: Remove Chrome extensions installed by enterprise policy otherwise, just go to the step below.
Open the Chrome main menu again, press to “Settings” option.
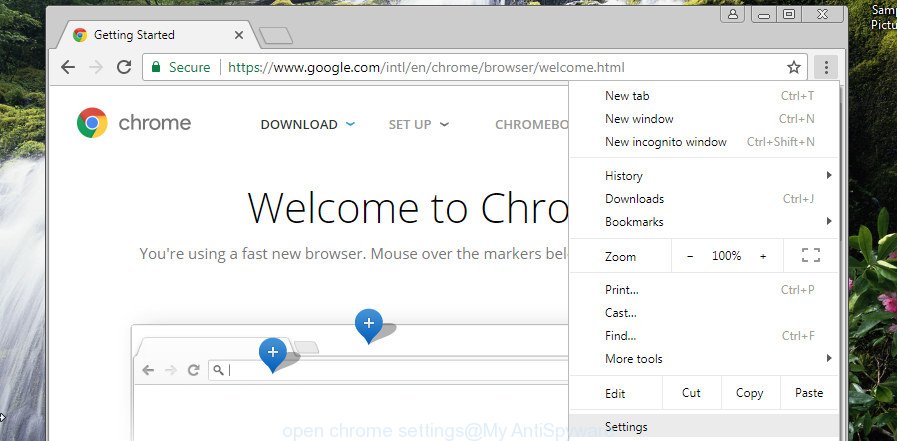
Scroll down to the bottom of the page and click on the “Advanced” link. Now scroll down until the Reset settings section is visible, similar to the one below and click the “Reset settings to their original defaults” button.
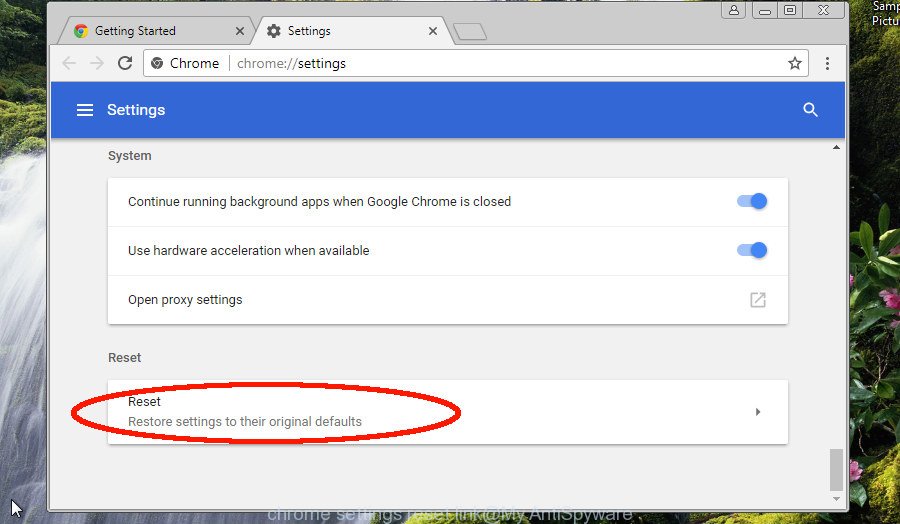
Confirm your action, click the “Reset” button.
Delete AssistiveFile from Firefox by resetting web browser settings
If the Firefox browser is hijacked by AssistiveFile and you want to restore the Firefox settings back to their default values, then you should follow the step-by-step guidance below. Your saved bookmarks, form auto-fill information and passwords won’t be cleared or changed.
First, open the Firefox and click ![]() button. It will display the drop-down menu on the right-part of the web browser. Further, press the Help button (
button. It will display the drop-down menu on the right-part of the web browser. Further, press the Help button (![]() ) like the one below.
) like the one below.

In the Help menu, select the “Troubleshooting Information” option. Another way to open the “Troubleshooting Information” screen – type “about:support” in the web-browser adress bar and press Enter. It will display the “Troubleshooting Information” page like below. In the upper-right corner of this screen, click the “Refresh Firefox” button.

It will display the confirmation dialog box. Further, click the “Refresh Firefox” button. The Firefox will begin a process to fix your problems that caused by the AssistiveFile adware. Once, it is complete, click the “Finish” button.
Delete AssistiveFile adware from Safari
The Safari reset is great if your web browser is hijacked or you have unwanted add-ons or toolbars on your internet browser, which installed by an malicious software.
Click Safari menu and choose “Preferences”.
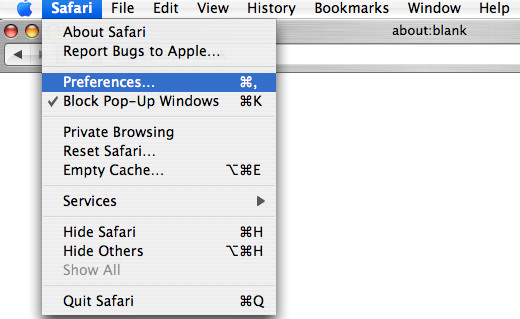
It will open the Safari Preferences window. Next, click the “Extensions” tab. Look for unknown and suspicious extensions on left panel, select it, then click the “Uninstall” button. Most important to remove all unknown extensions from Safari.
Once complete, click “General” tab. Change the “Default Search Engine” to Google.
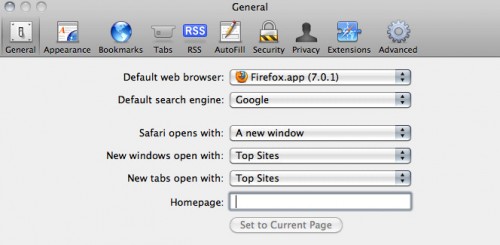
Find the “Homepage” and type into textfield “https://www.google.com”.
Automatic Removal of AssistiveFile adware software
Cyber security experts have built efficient adware removal tools to aid users in removing unwanted pop-ups and undesired advertisements. Below we will share with you the best malicious software removal tools with the ability to locate and delete AssistiveFile adware.
Automatically remove AssistiveFile with MalwareBytes
We advise using the MalwareBytes Free. You can download and install MalwareBytes Free to detect adware and thereby delete AssistiveFile ads from your web browsers. When installed and updated, this free malicious software remover automatically identifies and removes all threats present on the computer.
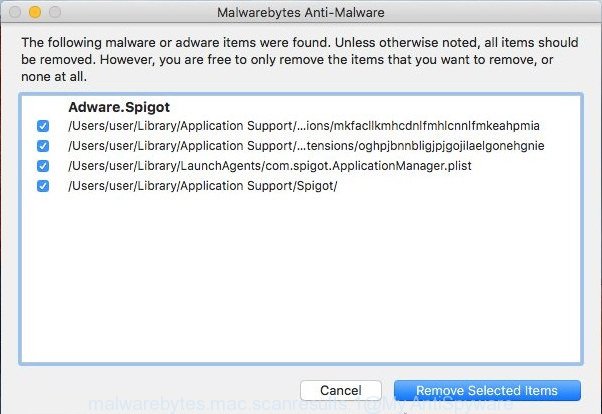
- MalwareBytes Anti-Malware (MBAM) can be downloaded from the following link.
Malwarebytes Anti-malware (Mac)
21022 downloads
Author: Malwarebytes
Category: Security tools
Update: September 10, 2020
- After downloading is complete, please close all programs and open windows on your machine. Run the downloaded file. Follow the prompts.
- The MalwareBytes Free will run and show the main window.
- Further, click the “Scan” button for checking your MAC system for the AssistiveFile adware. This process can take some time, so please be patient.
- After MalwareBytes Free has finished scanning, it will display the Scan Results.
- When you’re ready, click the “Remove Selected Items” button.
- Close the Anti-Malware and continue with the next step.
How to stay safe online
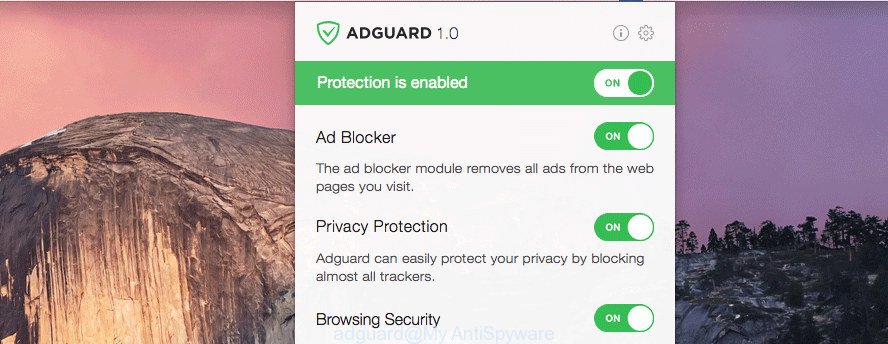
It is important to use ad blocker applications such as AdGuard to protect your MAC OS from harmful web pages. Most security experts says that it’s okay to block ads. You should do so just to stay safe! And, of course, the AdGuard may to block misleading and other unwanted web-sites.
- Please go to the link below to download AdGuard.
AdGuard for Mac download
3782 downloads
Author: © Adguard
Category: Security tools
Update: January 17, 2018
- Once downloading is complete, start the downloaded file. You will see the “Setup Wizard” program window. Follow the prompts.
- After the install is done, click “Skip” to close the setup application and use the default settings, or click “Get Started” to see an quick tutorial which will allow you get to know AdGuard better.
- In most cases, the default settings are enough and you don’t need to change anything. Each time, when you run your Apple Mac, AdGuard will start automatically and stop unwanted advertisements, block harmful and misleading web pages.
Finish words
Now your MAC system should be free of the AssistiveFile adware. We suggest that you keep AdGuard (to help you block unwanted advertisements and intrusive malicious webpages) and MalwareBytes AntiMalware (to periodically scan your MAC for new malicious software, browser hijacker infections and adware software). Make sure that you have all the Critical Updates recommended for Mac operating system. Without regular updates you WILL NOT be protected when new browser hijacker infections, harmful software and adware are released.
If you are still having problems while trying to get rid of AssistiveFile ads from your web browser, then ask for help here.

