What is Driver Support or “Driver Support with Active Optimization”? Experienced security professionals from Malwarebytes have determined that Driver Support is a potentially unwanted program (PUP) from the “system optimizers” family. These PUPs use false positives to trick you into buying their software. In the guide below, we will explain effective methods to remove Driver Support from Windows 10 and other versions of Microsoft Windows.
It is not a good idea to have an unwanted program like the Driver Support. The reason for this is simple, it doing things you do not know about. The worst is, the PUP be able to gather a wide variety of your personal data that can be later used for marketing purposes. You do not know if your home address, account names and passwords are safe. And of course you completely do not know what will happen when you click on any Driver Support popups.
The Driver Support spreads with a simple but quite effective way. It is integrated into the setup file of various freeware. Thus on the process of install, it will be installed onto your computer. In order to avoid potentially unwanted programs, you just need to follow a few simple rules: carefully read the Terms of Use and the license, select only a Manual, Custom or Advanced installation mode, which enables you to make sure that the program you want to install, thereby protect your system from potentially unwanted programs.
To find out how to remove Driver Support, we recommend to read the step-by-step tutorial added to this blog post below. The guide was prepared by experienced security researchers who discovered a method to delete potentially unwanted programs out of the Windows system.
How to remove Driver Support (removal guide)
Fortunately, we’ve an effective method which will assist you manually or/and automatically remove Driver Support from Windows 10 (8, 7, XP) and bring your system setting back to normal. Below you’ll find a removal steps with all the steps you may need to successfully remove Driver Support and its components. Certain of the steps will require you to reboot your computer or close this page. So, read this guidance carefully, then bookmark or print it for later reference.
To remove Driver Support, complete the following steps:
- Delete Driver Support potentially unwanted program without any utilities
- Driver Support automatic removal
- How to stay safe online
- To sum up
Delete Driver Support potentially unwanted program without any utilities
The following instructions is a step-by-step guide, which will help you manually remove Driver Support PUP from the Microsoft Internet Explorer, Firefox, MS Edge and Google Chrome.
Uninstall potentially unwanted programs using MS Windows Control Panel
It is of primary importance to first identify and remove all PUPs, PUP applications and browser hijackers through ‘Add/Remove Programs’ (Windows XP) or ‘Uninstall a program’ (Windows 10, 8, 7) section of your MS Windows Control Panel.
- If you are using Windows 8, 8.1 or 10 then click Windows button, next press Search. Type “Control panel”and press Enter.
- If you are using Windows XP, Vista, 7, then click “Start” button and press “Control Panel”.
- It will open the Windows Control Panel.
- Further, press “Uninstall a program” under Programs category.
- It will open a list of all applications installed on the PC system.
- Scroll through the all list, and remove suspicious and unknown apps. To quickly find the latest installed programs, we recommend sort programs by date.
See more details in the video tutorial below.
Get rid of unwanted Scheduled Tasks
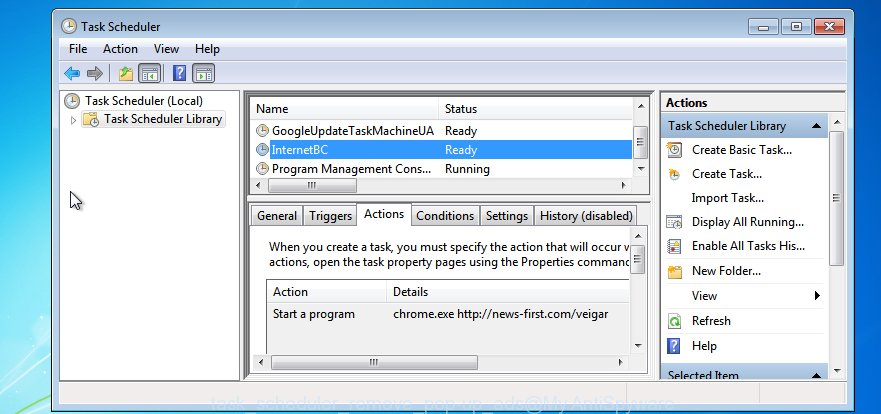
Once installed, the Driver Support can add a task in to the Windows Task Scheduler Library. Due to this, every time when you start your PC, the Driver Support will run itself automatically. So, you need to check the Task Scheduler Library and get rid of all harmful tasks which have been created by the Driver Support.
Press Windows and R keys on the keyboard together. This opens a prompt that called Run. In the text field, type “taskschd.msc” (without the quotes) and press OK. Task Scheduler window opens. In the left-hand side, click “Task Scheduler Library”, as displayed on the screen below.

Task scheduler
In the middle part you will see a list of installed tasks. Please choose the first task, its properties will be show just below automatically. Next, click the Actions tab. Pay attention to that it launches on your computer. Found something suspicious, then get rid of this harmful task. If you are not sure that executes the task, check it through a search engine. If it is a component of the adware, then this task also should be removed.
Having defined the task that you want to delete, then click on it with the right mouse button and select Delete as shown in the figure below.

Delete a task
Repeat this step, if you have found a few tasks which have been created by the Driver Support. Once is finished, close the Task Scheduler window.
Driver Support automatic removal
If you are an unskilled computer user, then we recommend to run free removal tools listed below to delete Driver Support PUP for good. The automatic way is highly recommended. It has less steps and easier to implement than the manual method. Moreover, it lower risk of system damage. So, the automatic Driver Support removal is a better option.
Run Malwarebytes to delete Driver Support
Remove Driver Support manually is difficult and often the potentially unwanted program is not completely removed. Therefore, we suggest you to use the Malwarebytes Free which are completely clean your PC. Moreover, the free program will allow you to delete malware, PUPs, toolbars and browser hijackers that your computer can be infected too.

- Download MalwareBytes from the following link.
Malwarebytes Anti-malware
327304 downloads
Author: Malwarebytes
Category: Security tools
Update: April 15, 2020
- Once the downloading process is finished, close all apps and windows on your computer. Open a file location. Double-click on the icon that’s named mb3-setup.
- Further, press Next button and follow the prompts.
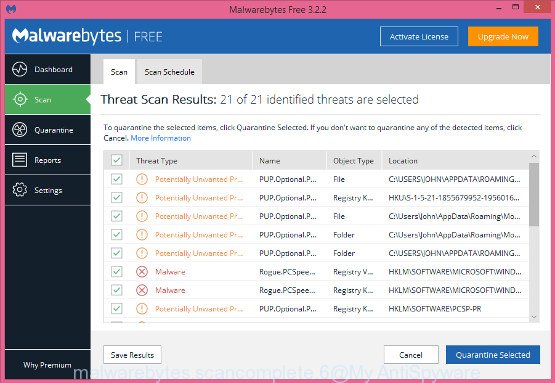
- Once installation is finished, click the “Scan Now” button to detect Driver Support and other PUPs. This process can take quite a while, so please be patient. While the MalwareBytes Free is scanning, you may see number of objects it has identified either as being malware.
- As the scanning ends, MalwareBytes Anti-Malware (MBAM) will open a screen which contains a list of unwanted software that has been found. Review the report and then click “Quarantine Selected”. When the clean up is complete, you can be prompted to reboot your PC system.
The following video offers a steps on how to remove hijackers, adware and other malware with MalwareBytes AntiMalware (MBAM).
How to stay safe online
To put it simply, you need to use an ad blocker utility (AdGuard, for example). It’ll stop and protect you from all unwanted web-pages, ads and pop-ups. To be able to do that, the ad blocker program uses a list of filters. Each filter is a rule that describes a malicious web-page, an advertising content, a banner and others. The adblocker program automatically uses these filters, depending on the websites you are visiting.
Installing the AdGuard is simple. First you’ll need to download AdGuard from the following link.
26910 downloads
Version: 6.4
Author: © Adguard
Category: Security tools
Update: November 15, 2018
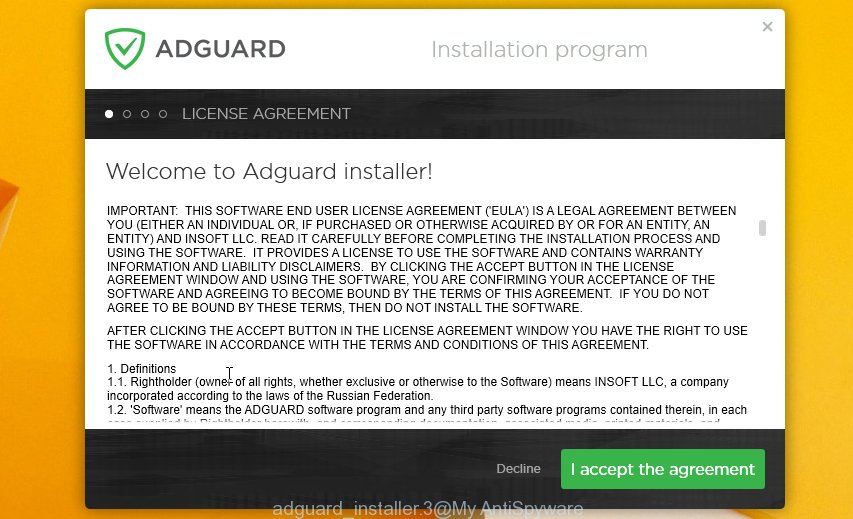
After the downloading process is complete, start the downloaded file. You will see the “Setup Wizard” screen as shown on the image below.

Follow the prompts. When the installation is complete, you will see a window as shown on the image below.

You can click “Skip” to close the install program and use the default settings, or press “Get Started” button to see an quick tutorial which will help you get to know AdGuard better.
In most cases, the default settings are enough and you don’t need to change anything. Each time, when you start your machine, AdGuard will start automatically and stop unwanted ads, as well as other malicious or misleading web-sites. For an overview of all the features of the program, or to change its settings you can simply double-click on the AdGuard icon, which can be found on your desktop.
To sum up
Now your PC should be free of the Driver Support and other PUPs. We suggest that you keep AdGuard (to help you stop unwanted pop up ads and undesired malicious web sites) and Zemana (to periodically scan your PC system for new PUPs and other malware). Probably you are running an older version of Java or Adobe Flash Player. This can be a security risk, so download and install the latest version right now.
If you are still having problems while trying to remove Driver Support from the Windows 10 (8, 7 or XP), then ask for help here here.


