The appearance of annoying detect.dikx.gdn ads in your web browser means that your machine is infected with an ‘ad-supported’ software (also known as adware). It makes changes to the computer settings and configures itself so as to start automatically each time the computer is turned on. Immediately after startup, the adware begins to monitor the user’s actions and insert advertisements directly into the open windows of the Google Chrome, FF, Edge and Microsoft Internet Explorer. So, if you notice that your web browser has become display this site, then you do not need to wait . Perform the instructions below and remove detect.dikx.gdn advertisements as quickly as possible.

The adware usually affects only the Google Chrome, FF, Internet Explorer and Edge by changing the internet browser’s settings or installing a dangerous extensions (addons). Moreover, possible situations, when any other web-browsers will be affected too. The adware will perform a scan of the machine for web browser shortcuts and modify them without your permission. When it infects the browser shortcuts, it’ll add the argument like ‘http://site.address’ into Target property. So, each time you run the browser, you will see an annoying detect.dikx.gdn web-site.
The ‘ad-supported’ software is not a virus, but the virus behaves similarly. As a rootkit hides in the system, alters browser settings and blocks them from changing. Also the ad supported software can install additional browser extensions, addons and modules that will inject advertising banners within the Chrome, Firefox, Internet Explorer and MS Edge’s screen. Moreover, the ad supported software may install a browser hijacker that once started, will alter the web browser’s homepage and search engine. And finally, the adware can collect a wide variety of personal information such as what web pages you are opening, what you are looking for the Internet and so on. This information, in the future, may be transferred to third parties.
Therefore it is very important to follow the step-by-step guide below as quickly as possible. The instructions will assist you to remove adware as well as clean your machine from the detect.dikx.gdn pop-ups. What is more, the instructions below will help you delete other malicious software like unwanted toolbars and browser hijackers, which could penetrate the computer along with the ‘ad-supported’ software.
How does detect.dikx.gdn advertisements get installed onto PC system
The ad-supported software usually come bundled with free software that downloaded from the World Wide Web. Which means that you need to be proactive and carefully read the Terms of use and the License agreement properly. For the most part, the adware will be clearly described, so take the time to carefully read all the information about the program that you download off the Net and want to install on your PC system. In the Setup wizard, you should select the Advanced, Custom or Manual installation mode to control what components and additional programs to be installed, otherwise you run the risk of infecting your PC with an infection like the ad-supported software that generates a large amount of detect.dikx.gdn advertisements.
How to manually remove detect.dikx.gdn ads
Without a doubt, the adware is harmful to your PC. So you need to quickly and completely delete this malicious software. To remove this adware, you can use the manual removal which are given below, or use an anti-malware tool for removing dangerous programs, such as Malwarebytes Anti-malware and AdwCleaner (both are free). I note that we recommend that you use automatic removal, which will allow you to remove detect.dikx.gdn pop-up ads easily and safely. Manual removal is best used only if you are well versed in computer or in the case where ad supported software is not removed automatically.
- Remove suspicious and unknown software by using Windows Control Panel
- Disinfect the browser’s shortcuts to get rid of detect.dikx.gdn redirect
- Remove detect.dikx.gdn redirect from Firefox
- Remove detect.dikx.gdn ads from Google Chrome
- Remove detect.dikx.gdn ads from Microsoft Internet Explorer
- Remove unwanted Scheduled Tasks
Uninstall suspicious and unknown software by using Windows Control Panel
We recommend that you begin the machine cleaning procedure by checking the list of installed applications and uninstall all unknown or suspicious applications. This is a very important step, as mentioned above, very often the malicious programs such as ‘ad-supported’ software and browser hijackers may be bundled with free applications. Delete the unwanted programs may remove the unwanted ads or web browser redirect to unknown or annoying web sites.
Windows 8, 8.1, 10
Windows XP, Vista, 7
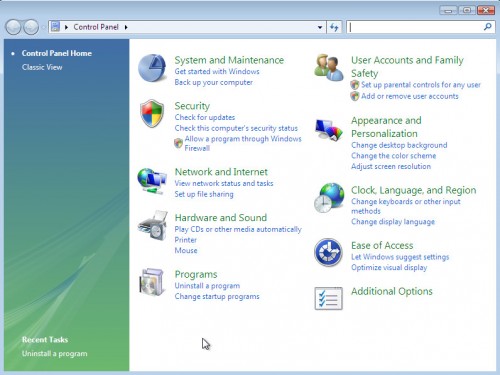
Next, click “Uninstall a program” ![]() It will open a list of all applications. Scroll through the all list, and uninstall any suspicious and unknown applications. To quickly find the latest installed software, we recommend sort applications by date of installation in the Control panel.
It will open a list of all applications. Scroll through the all list, and uninstall any suspicious and unknown applications. To quickly find the latest installed software, we recommend sort applications by date of installation in the Control panel.
Disinfect the browser’s shortcuts to get rid of detect.dikx.gdn redirect
When installed, the ad-supported software may add an argument like “http://site.address” into the Target property of the desktop shortcut for the Google Chrome, Internet Explorer, Firefox and MS Edge. Due to this, every time you run the web browser, it will display the detect.dikx.gdn annoying web site.
Right click on the web browser’s shortcut, click Properties option. On the Shortcut tab, locate the Target field. Click inside, you will see a vertical line – arrow pointer, move it (using -> arrow key on your keyboard) to the right as possible. You will see a text which begins with “http://”. Remove it or everything after .exe. An example, for Google Chrome you should remove everything after chrome.exe.

Next, click OK to save changes. You need to clean all browser’s shortcuts. So, repeat this step for the Chrome, Firefox, IE and MS Edge.
Remove detect.dikx.gdn redirect from Firefox
First, run the Firefox. Next, click the button in the form of three horizontal stripes (![]() ). It will open the drop-down menu. Next, click the “Help” button (
). It will open the drop-down menu. Next, click the “Help” button (![]() ).
).

In the Help menu, click the “Troubleshooting Information”. In the upper-right corner of the “Troubleshooting Information” page, click “Refresh Firefox” button.

Confirm your action, press the “Refresh Firefox”.
Remove detect.dikx.gdn ads from Google Chrome
Reset Google Chrome settings is a simple way to remove the malicious and ad-supported extensions, as well as to restore the browser’s homepage and search engine by default that have been modified by ad supported software.

- Open the Chrome, then click the Menu icon (icon in the form of three horizontal stripes).
- It will open the Chrome main menu. Click the “Settings” menu.
- Next, click the “Show advanced settings” link, which located at the bottom of the Settings page.
- Further, click the “Reset settings” button, that located at the bottom of the Advanced settings page.
- The Chrome will show the reset settings prompt as shown on the image above.
- Confirm the web-browser’s reset by clicking on the “Reset” button.
- To learn more, look the post How to reset Chrome settings to default.
Remove detect.dikx.gdn ads from Microsoft Internet Explorer
To remove the detect.dikx.gdn advertisements you need to reset the Internet Explorer to the state, that was when the Windows was installed on your machine.
First, start the Internet Explorer, then click ‘gear’ icon ![]() . It will display the drop-down menu on the right part of the browser, then click the “Internet Options” as on the image below.
. It will display the drop-down menu on the right part of the browser, then click the “Internet Options” as on the image below.

In the “Internet Options” screen, you need to select the “Advanced” tab and click the “Reset” button. The Microsoft Internet Explorer will display the “Reset Internet Explorer settings” prompt as on the image below. Next, click the “Delete personal settings” check box to select it. After that, click the “Reset” button.

Once the process is complete, click “Close” button. Close the Internet Explorer and reboot your PC system for the changes to take effect. This step will help you to restore your internet browser’s settings to default state and disable ‘ad-supported’ extensions.
Remove unwanted Scheduled Tasks
If the unwanted detect.dikx.gdn page opens automatically on Windows startup or at equal time intervals, then you need to check the Task Scheduler Library and delete all the tasks that have been created by malicios program.
Press Windows and R keys on the keyboard together. This displays a prompt that titled with Run. In the text field, type “taskschd.msc” (without the quotes) and click OK. Task Scheduler window opens. In the left-hand side, click “Task Scheduler Library”, as shown on the screen below.
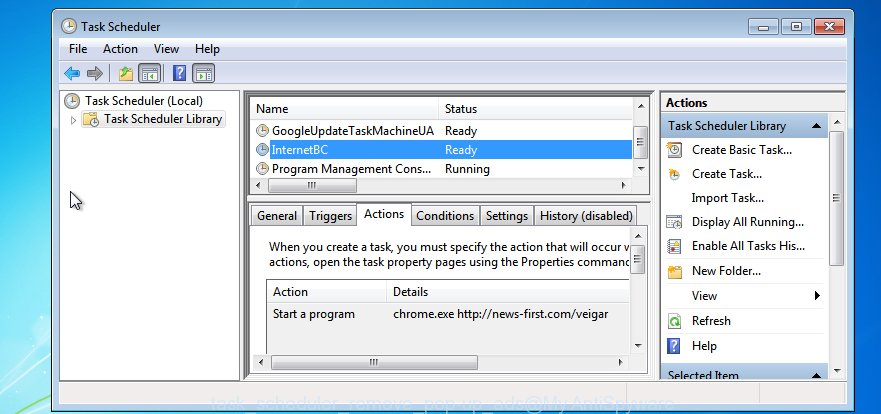
Task scheduler
In the middle part you will see a list of installed tasks. Select the first task, its properties will be show just below automatically. Next, press the Actions tab. Pay attention to that it launches on your machine. Found something like “explorer.exe http://site.address” or “chrome.exe http://site.address”, then you need delete it. If you are not sure that executes the task, check it through a search engine. If it’s a component of the ‘ad-supported’ programs, then this task also should be removed.
Having defined the task that you want to delete, then click on it with the right mouse button and select Delete like below.
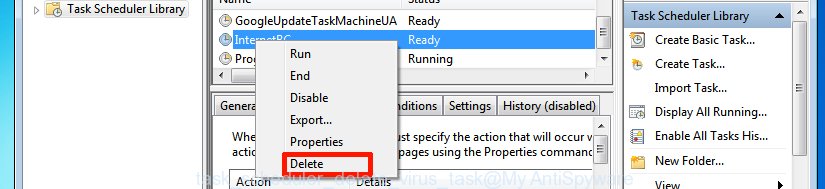
Delete a task
Repeat this step, if you have found a few tasks that have been created by malicios application. Once is done, close the Task Scheduler window.
Get rid of detect.dikx.gdn pop-up ads with Malwarebytes
Remove detect.dikx.gdn pop-ups manually is difficult and often the adware is not completely removed. Therefore, we recommend you to use the Malwarebytes Free that are completely clean your system. The Malwarebytes is a reputable malware removal program. It can automatically detect and remove the adware (sometimes called ‘ad-supported’ software) of the your computer. Moreover, this free application will help you to get rid of web browser hijackers, malware and toolbars that your system may be infected too. You can follow the step-by-step guide below to remove the detect.dikx.gdn annoying redirect completely.
Download Malwarebytes Free using the link below.
328344 downloads
Author: Malwarebytes
Category: Security tools
Update: April 15, 2020
Once downloaded, close all applications and windows on your PC. Open a directory in which you saved it. Double-click on the icon that’s named mb3-setup like below.
![]()
When the installation starts, you will see the “Setup wizard” that will help you install Malwarebytes on your machine.

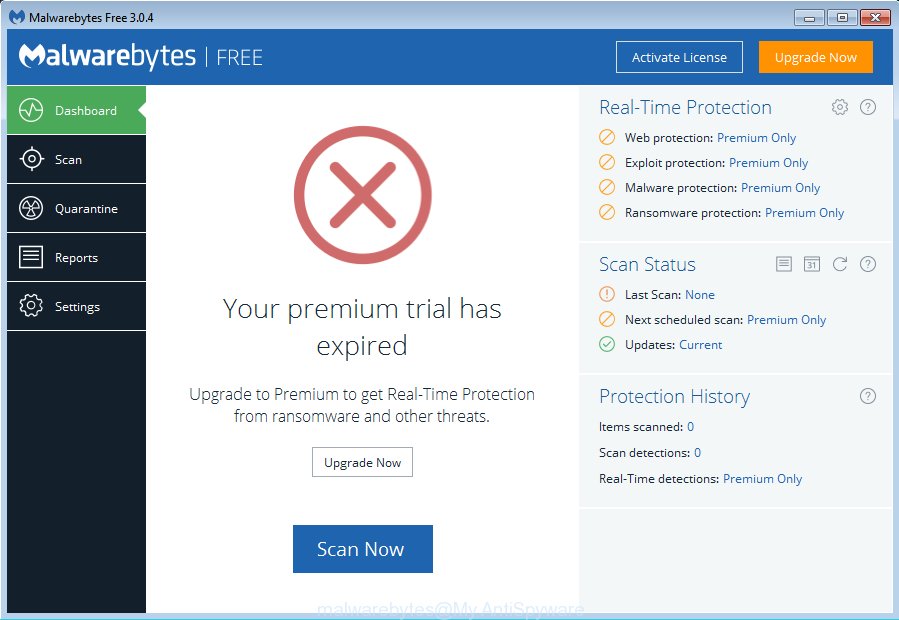
Once install is complete, you will see window as shown in the figure below.
Now click on the “Scan Now” button to perform a system scan for the adware that causes the redirect to detect.dikx.gdn web page. This process can take some time, so please be patient.
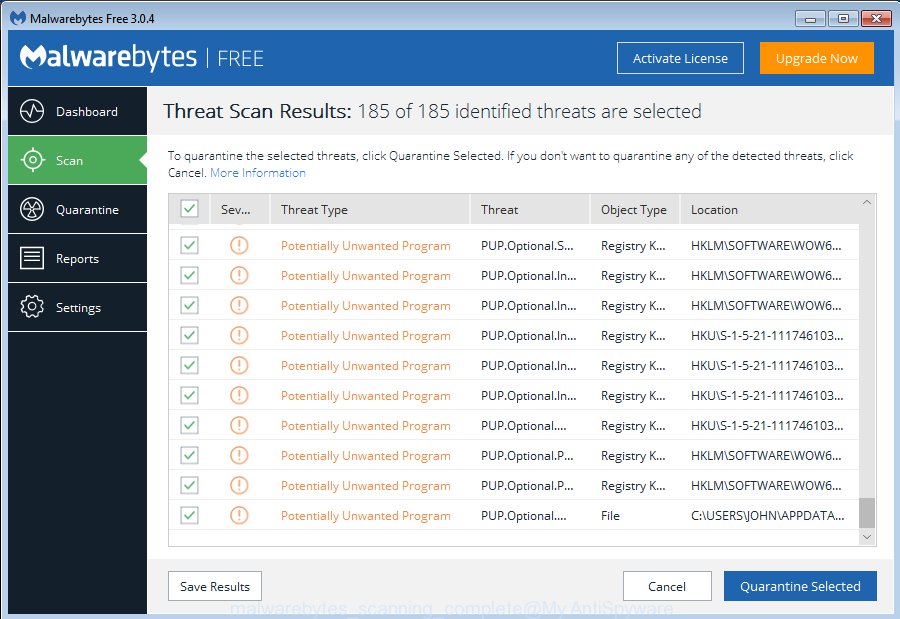
Once the scanning is finished, make sure all entries have “checkmark” and click “Quarantine Selected” button. The Malwarebytes will begin removing the ad supported software related files, folders, registry keys. When the disinfection is finished, you may be prompted to restart the computer.
The following video explains the few simple steps above on how to remove ‘ad-supported’ software with Malwarebytes Anti-malware.
How to stop detect.dikx.gdn ads
To increase your security and protect your personal computer against new unwanted ads and malicious web-pages, you need to use an application that blocks access to dangerous ads and web sites. Moreover, the application can block the show of intrusive advertising, that also leads to faster loading of web-pages and reduce the consumption of web traffic.
- Download AdGuard program using the following link.
 Adguard download
27373 downloads
Version: 6.4
Author: © Adguard
Category: Security tools
Update: November 15, 2018
- When downloading is done, run the downloaded file. You will see the “Setup Wizard” window. Follow the prompts.
- Once the installation is finished, click “Skip” to close it and use the default settings, or press “Get Started” to see a quick tutorial which will help you get to know AdGuard better.
- In most cases, the default settings are enough and you do not need to change anything. Each time, when you launch your machine, AdGuard will launch automatically and block popup ads, detect.dikx.gdn redirects, as well as other malicious or misleading web-pages. For an overview of all the features of the program, or to change its settings you can simply double-click on the AdGuard icon, which is located on your Windows desktop.
Get rid of detect.dikx.gdn pop-ups and malicious extensions with AdwCleaner.
If MalwareBytes cannot delete the annoying detect.dikx.gdn pop-ups from the Chrome, Firefox, Internet Explorer and Microsoft Edge, then we suggests to use the AdwCleaner. AdwCleaner is a free removal tool for adware, browser hijackers, PUPs and toolbars.
Download AdwCleaner using the link below.
225891 downloads
Version: 8.4.1
Author: Xplode, MalwareBytes
Category: Security tools
Update: October 5, 2024
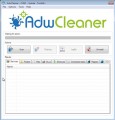
After downloading is finished, open the directory in which you saved it. Double click the AdwCleaner icon. Once this tool is started, you will see a screen such as below.

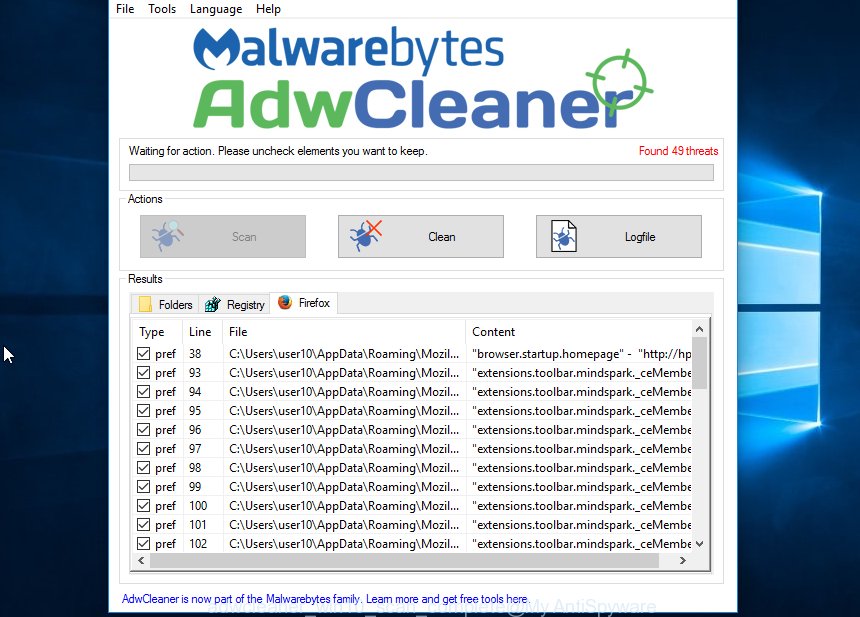
Now, click the “Scan” button to start scanning your computer for the malicious extensions and ‘ad-supported’ software which shows ads from detect.dikx.gdn site. Once the system scan is finished, it will show a scan report as shown below.
Review the report and then click “Clean” button. It will open a prompt. Click “OK”. When the cleaning process is finished, AdwCleaner may ask you to restart your computer.
Look at the following video, which completely explains the procedure of using the AdwCleaner to delete adware, browser hijackers and other dangerous applications.
Finish words
Now your personal computer should be free of the detect.dikx.gdn . Remove AdwCleaner. We suggest that you keep AdGuard (to help you block unwanted popup ads and annoying malicious pages) and Malwarebytes (to periodically scan your PC for new malware and ad-supported software). Probably you are running an older version of Java or Adobe Flash Player. This can be a security risk, so download and install the latest version right now.
If you are still having problems while trying to remove detect.dikx.gdn pop-ups from your PC system, then ask for help in our Spyware/Malware removal forum.